How to Compress a MOV File Without Losing Quality
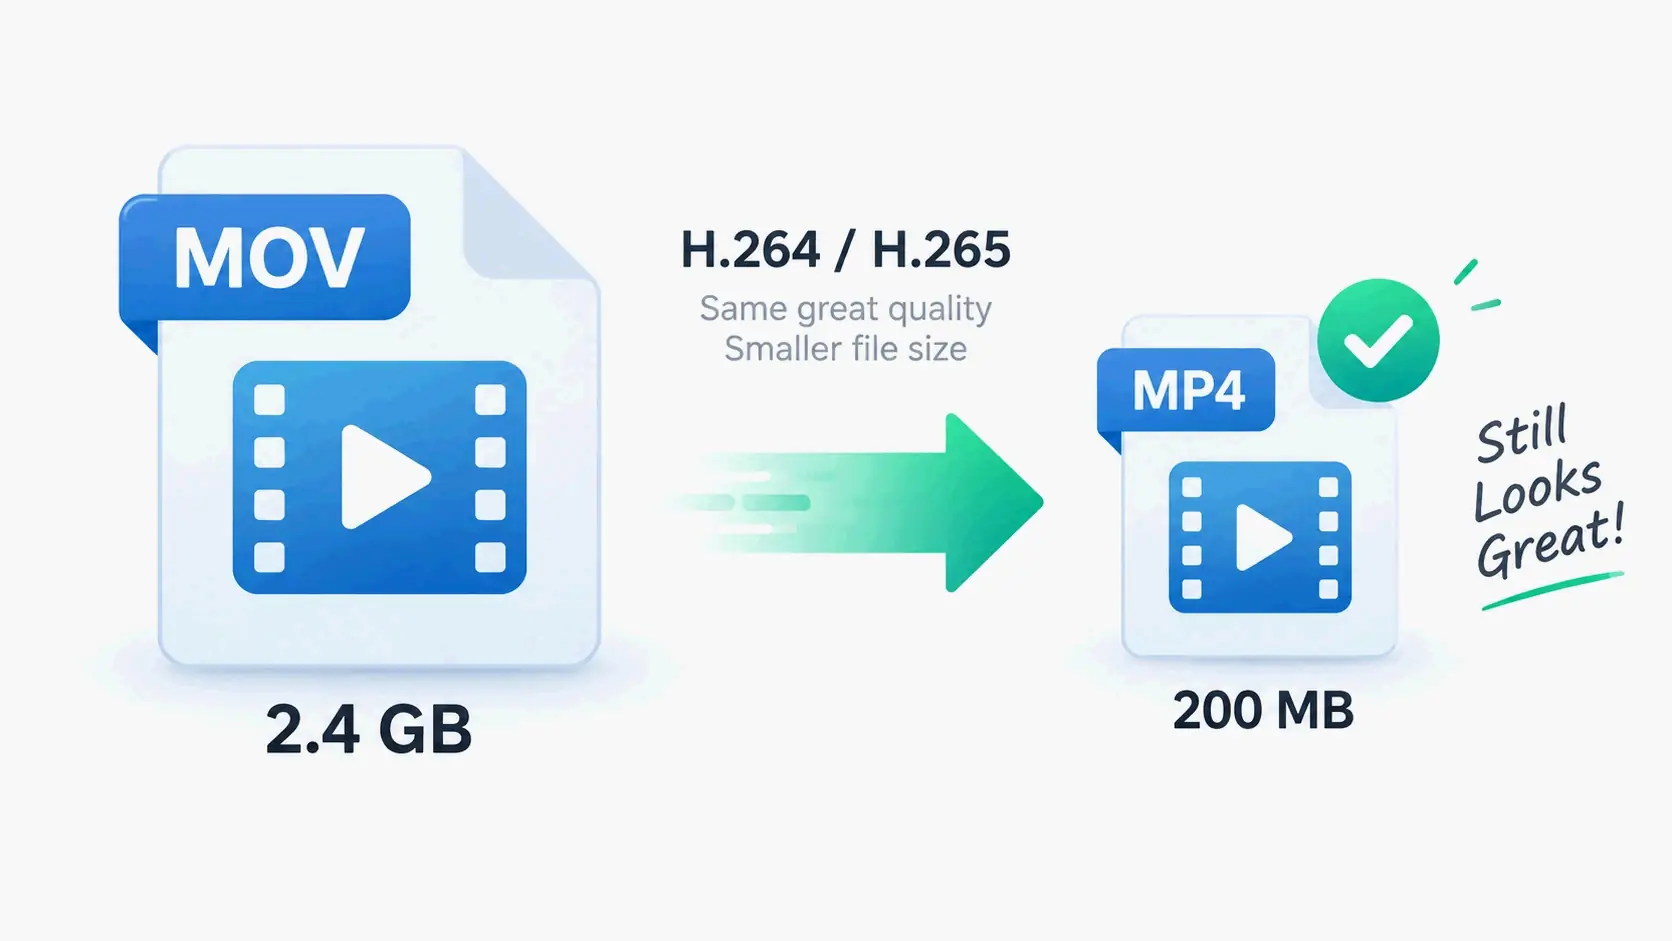
The fastest way to compress a MOV file without losing quality is to re-encode it with a modern codec: convert ProRes or high-bitrate MOV to H.264 for compatibility, or H.265 for smaller files, lower the bitrate, and export as MP4. Expect 50–90% reductions with little visible quality loss — but verify a 15-second sample first.
Why Your MOV File Is So Big: It’s a Container, Not a Codec
MOV is a container format, not a video format. The same .mov extension can hold H.264, H.265, Apple ProRes, DNxHD, Motion JPEG, or uncompressed audio, and the file size depends entirely on what’s inside. Two files with the same duration and the same filename can differ by a factor of twenty.
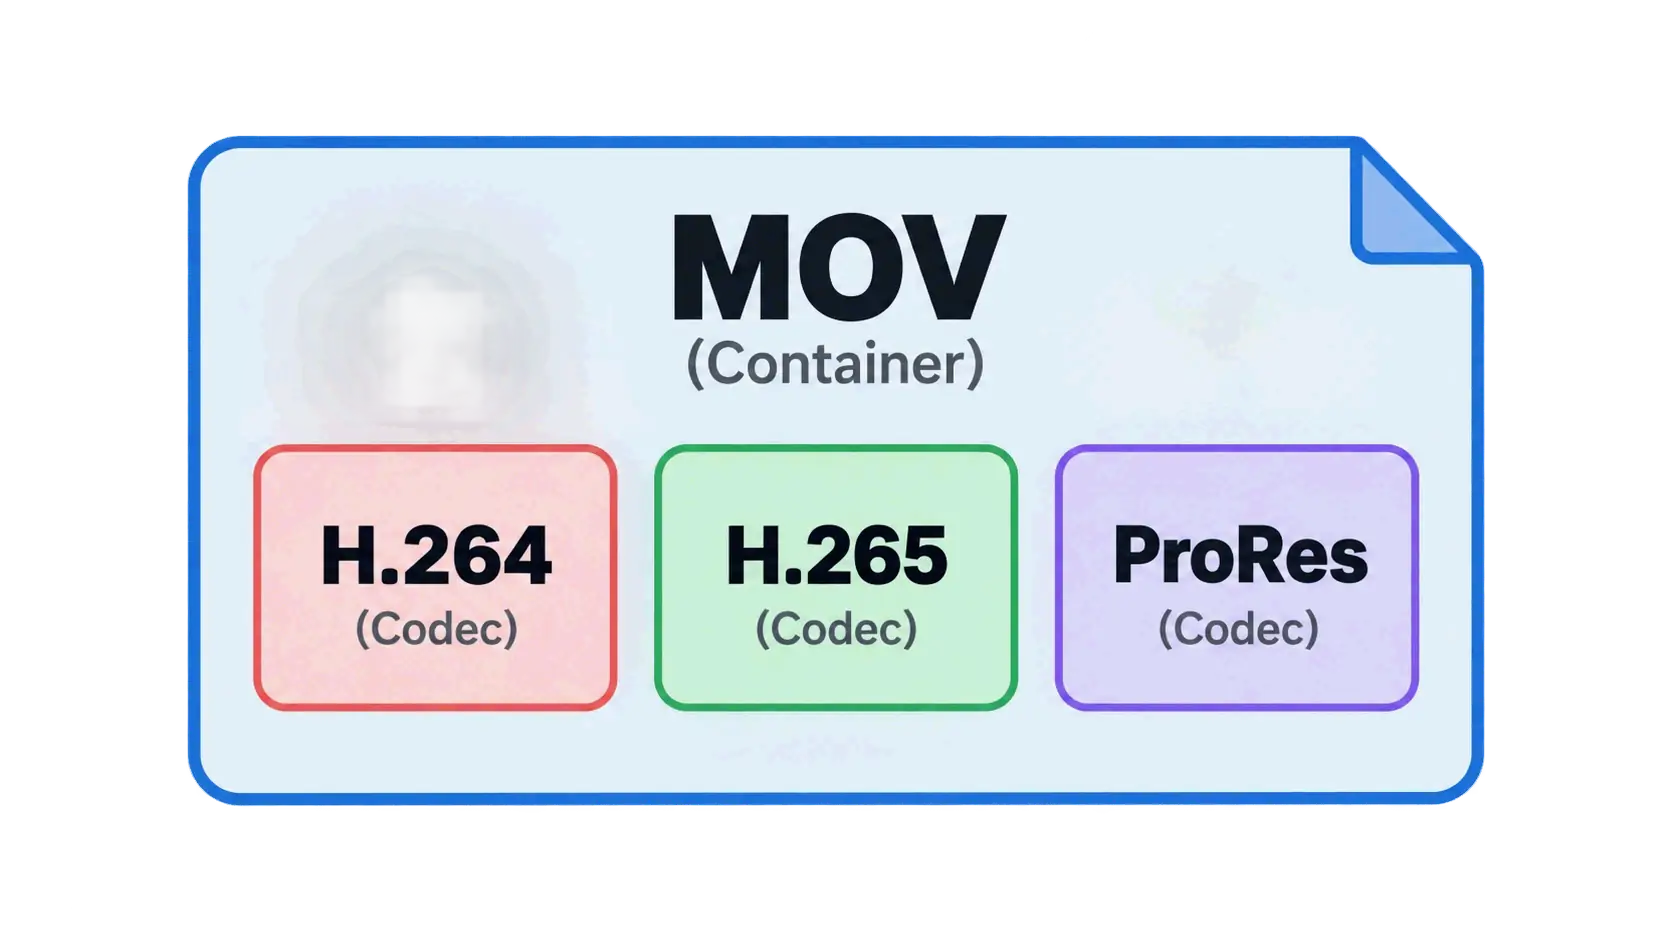
ProRes is the single most common reason a MOV is huge. ProRes looks excellent and edits smoothly, but it eats storage fast: a short 4K ProRes clip can hit several gigabytes within minutes, while the same footage encoded as H.264 takes up a fraction of that space. Screen recordings balloon the same way when the capture tool defaults to a high bitrate. That’s why a two-minute clip can take longer to upload than it took to record.
File size ≈ bitrate × duration, which makes bitrate the biggest single lever you control. According to WowTechHub, re-encoding high-bitrate or ProRes MOV to H.264 or H.265 typically cuts size by 50% to 90% — a 4 GB 1080p MOV recorded at 60 Mbps becomes roughly a 600 MB file at 10 Mbps, with very little visible loss. The same lever drives compressing any video without losing quality; MOV is just the container where it shows up most.
Encoder choice compounds that gain. WonderFox illustrates it with a 100-minute 4K source: the same footage lands at roughly 30 GB in MPEG-4, about 10 GB in H.264, and around 5 GB in H.265 or VP9 — a 3x to 6x overall reduction. The point isn’t to make every file tiny. As Ava Taylor of WowTechHub puts it, “Compression is not about making every file tiny. It is about making the file small enough for its purpose while keeping viewers from noticing the tradeoff.”
Check What’s Inside Your MOV in 30 Seconds
Before you change a single setting, identify what the file actually contains. Open it in QuickTime Player and use the movie inspector to read the codec, resolution, and data rate. Or inspect the file with a utility such as MediaInfo or ffprobe and look at three numbers: video codec, bitrate, and resolution.
Those three values decide everything downstream. A 50 Mbps H.264 source has enormous headroom; a 5 Mbps H.264 source has almost none. Note the audio codec at the same time — uncompressed audio inside a MOV is rare, but it inflates a file noticeably when present.
The Formula That Predicts Your Result: Bitrate × Duration
Size math is simple enough to do in your head. Multiply the bitrate by the duration, and you get the approximate file size — a 60 Mbps clip runs about 7.5 MB per second, or roughly 450 MB per minute, before audio.
Use that to set expectations before encoding. If the input bitrate is 60 Mbps and your target is 8 Mbps, you’re asking for a 7.5x reduction, which a modern codec handles comfortably. If the input is already 6 Mbps, the same target demands visible sacrifices. Resolution and frame rate feed into this too: higher resolutions and frame rates like 60 fps, 90 fps, or 120 fps require proportionally more data to stay sharp. That’s why a 4K60 clip is so much heavier than a 1080p30 clip of the same length.
How to Compress a MOV File: The 3-Step Method
The practical workflow comes down to three decisions — codec, quality target, and output container — plus one optional set of geometry levers if you still need more space.
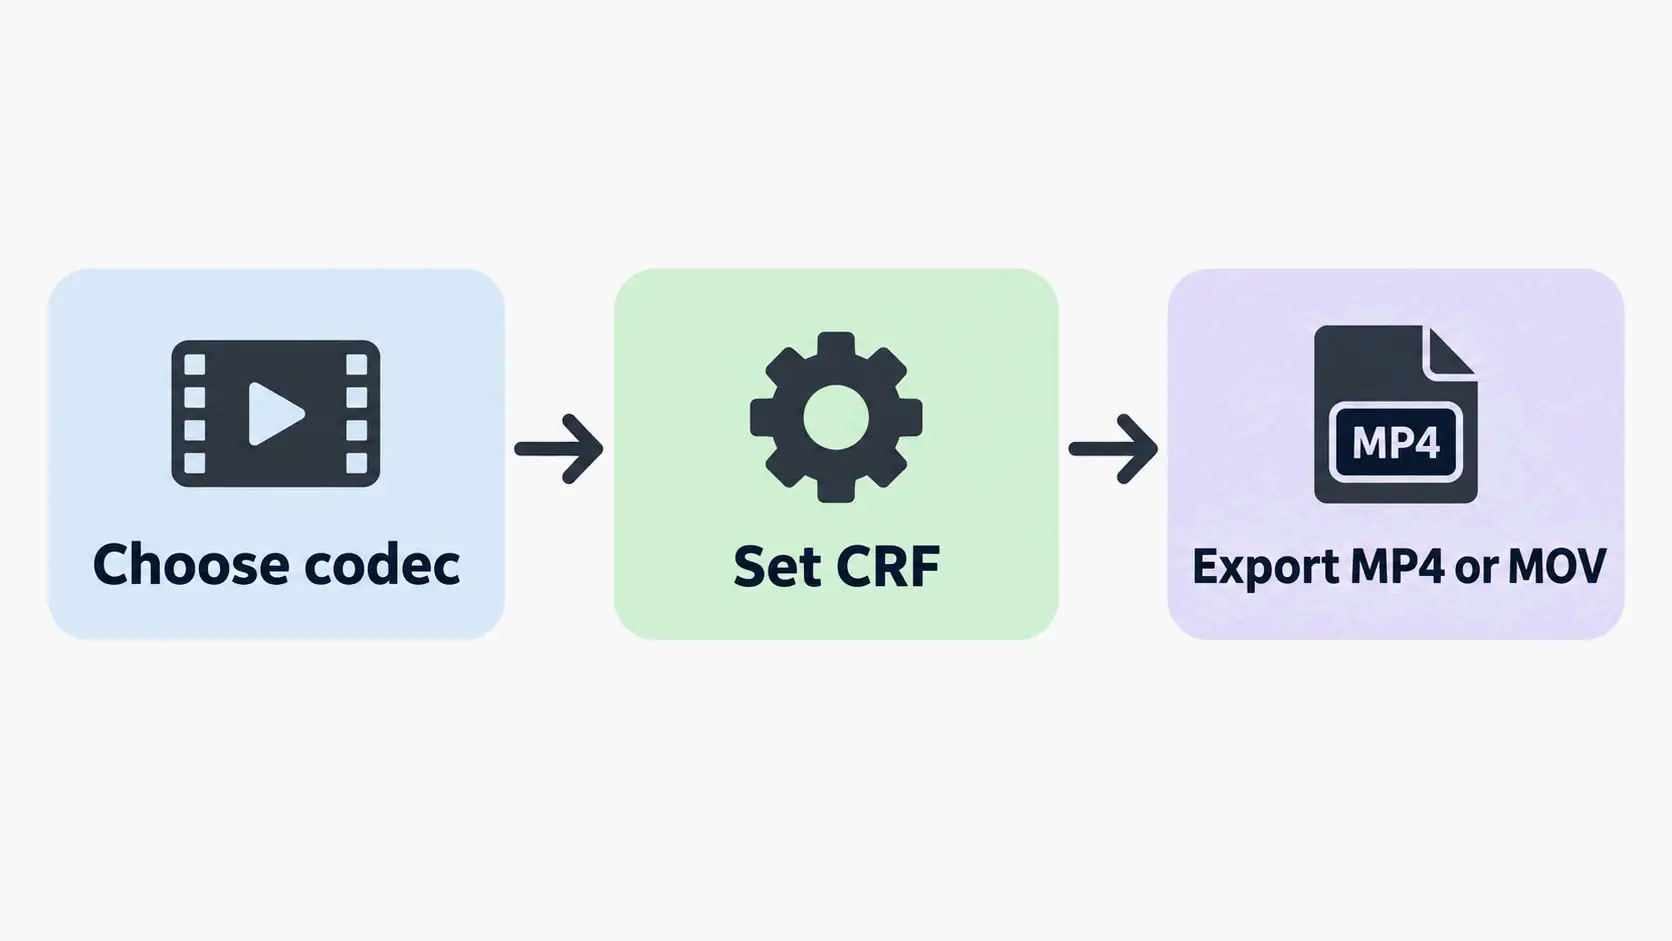
Step 1: H.264 or H.265 — Which Codec Should Your MOV Become?
H.264 (AVC) is the compatibility default: it plays almost everywhere, on nearly every device made in the past decade. H.265 (HEVC) delivers smaller files at the same visual quality, which matters most for 4K and long clips, but it encodes far more slowly and older hardware may fail to play it.
Choose H.264 when the file’s destination is unknown or broad. Choose H.265 when you control playback and size is the priority. Either way, remember that ProRes is a source codec, not a delivery codec — it belongs in your editing pipeline, not in an email.
Step 2: CRF 22 as Your Default (and When to Go Lower)
Use Constant Quality (CRF) rather than guessing a bitrate. According to Uploadex, CRF 22 is the everyday “looks the same to me” setting: high-bitrate sources can drop by roughly 80% with no visible loss, while H.265 pushes the savings further. HandBrake’s own scale treats 18 as visually lossless at a large file size, 20–22 as visually lossless to most viewers, 23 as showing slight loss on a side-by-side, and 24–28 as noticeably compressed.
Recommended ranges: H.264 → CRF 18–23; H.265 → CRF 22–28. The first-pass sanity command in FFmpeg looks like this:
ffmpeg -i input.mov -c:v libx264 -crf 22 -preset slow -c:a aac -b:a 128k output.mp4
-preset slow trades encoding time for better compression efficiency. For H.265, swap in libx265 and CRF 24.
Step 3: Export as MP4, or Keep the MOV Wrapper?
Converting MOV to MP4 is the most common path because MP4 balances size, compatibility, and sharing. Keeping the MOV wrapper makes sense when the file is heading back into an editing pipeline that expects ProRes-class handling.
Audio deserves its own decision. AAC at 128 kbps is enough for voice and screen recordings; 192–256 kbps is safer for music-heavy content. Over-compressing audio makes otherwise good video feel cheap. And since audio is a small share of total size, there’s little to gain from cutting it below 128 kbps.
If the file is still too large after codec and CRF are set, then reach for geometry: downscale resolution, then reduce frame rate from 60 to 30 fps. Change codec and CRF first, geometry last.
Source Type × Target Use: The MOV Compression Decision Table
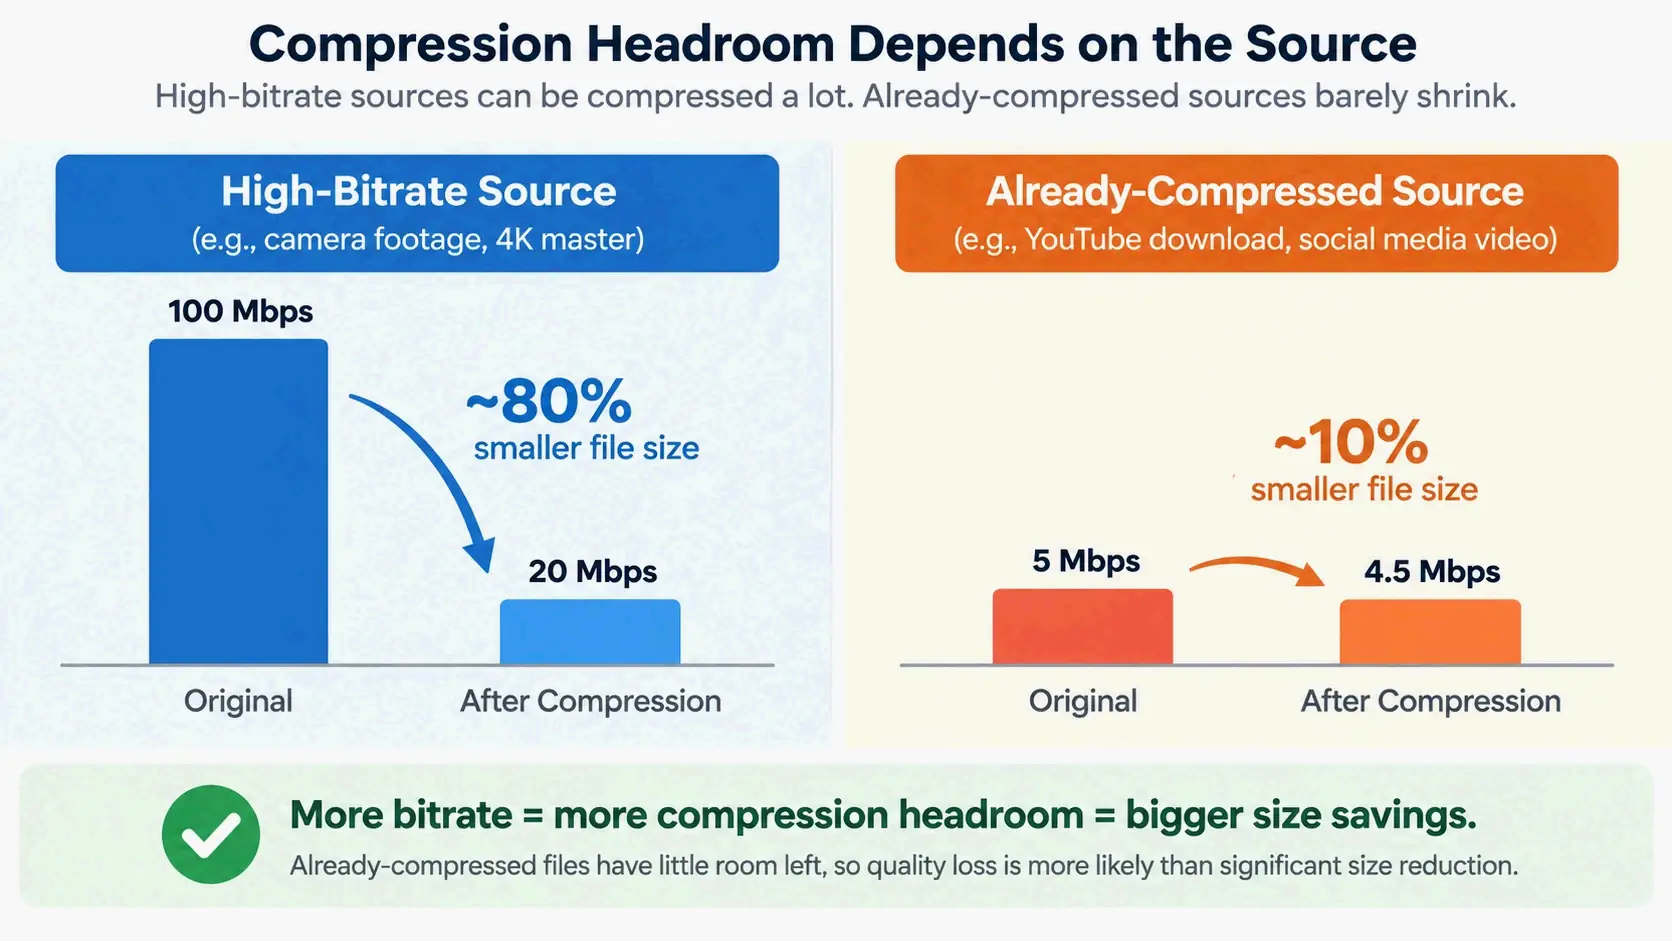
Most guides mix ProRes sources and already-compressed H.264 sources into the same advice, but their headroom is completely different — one can shrink by 80%, the other barely moves. This table separates them.
| Source bitrate (MOV contents) | After CRF 22 H.264 | After CRF 22 H.265 | Visible quality loss |
|---|---|---|---|
| 4K ProRes master → delivery copy | ~80% smaller | Smaller still | None |
| 50 Mbps (raw camera H.264) | ~6 Mbps | ~4 Mbps | None visible |
| 20 Mbps (high-quality export) | ~4 Mbps | ~3 Mbps | None visible |
| 10 Mbps (typical online video) | ~3 Mbps | ~2 Mbps | None visible |
| 5 Mbps (already compressed) | ~3 Mbps | ~2 Mbps | Slight at busy scenes |
Source: Uploadex, which frames the rule plainly — you can drop a high-bitrate source by 80% without visible loss, but you cannot drop an already-compressed file by another 80%, because there is no quality left to throw away.
Match the output to its destination rather than to a single universal setting. WowTechHub offers typical bands by use case:
| Use case | Resolution | Codec | Typical bitrate |
|---|---|---|---|
| Email preview | 720p | H.264 | 2–5 Mbps |
| Website video | 1080p | H.264 or H.265 | 5–10 Mbps |
| 4K sharing copy | 4K | H.265 | 20–35 Mbps |
| Archive master | Original | ProRes or high bitrate | Keep original |
Resolution downscaling (4K to 1080p) is one of the few remaining levers once CRF is fixed, but only apply it when the destination platform never displays 4K. For screen recordings, confirm small text is still legible before committing.
Keep the original as a master. The compressed file is a delivery copy, not a replacement. That single habit prevents the re-compression death spiral where a file is squeezed again and again until artifacts dominate.
Reading the Table: Same MOV, Five Very Different Outcomes
Batch results show how much this matters at scale. One marketing team holding 200 product clips went from 800 GB to about 120 GB by re-encoding delivery copies while masters stayed on a backup drive, according to WowTechHub. A creator’s review folder of ten 3 GB 4K MOV files dropped from 30 GB to roughly 5 GB — about 83% — the same way.
Frame-rate reduction is an optional last row in this table: 60 → 30 fps where the platform does not need 60 fps.
Screen-Recording MOV Files Compress Differently
QuickTime and OBS screen recordings are among the most common .mov sources, and the generic “just drop the resolution” advice backfires on them. Static UI and slideshow-style frames compress extremely well, so raise CRF to 26–30 before touching resolution at all.
Keep resolution when the recording contains small text, code, or UI labels. Downscaling destroys readability in a way that CRF never does — a slightly softer gradient is forgivable, an unreadable menu bar is not. Validate with a 15-second sample at full size before committing to a 40-minute render.
Frame-rate reduction is usually safe here, since most recordings do not need 60 fps. A Microsoft Tech Community thread from September 2026 captures the classic version of this problem: a user named Rhysin had QuickTime screen recordings over 1 GB plus other movies stored on a Windows 10 PC, and needed both smaller files and something small enough to email.
How to Compress a MOV File on Mac: QuickTime, iMovie, and Finder
Mac users have three built-in options, and all three are convenient but limited in the same way: they give you presets, not parameters.
QuickTime’s Export As Options (and Their Limits)
QuickTime Player is both the main source of .mov files and a limited export tool. File → Export As offers 1080p, 720p, and 480p options plus a “Smaller File Size (HEVC)” choice, but it gives no CRF control and no reliable size estimate before you commit. QuickTime’s Share → Email path does show an estimated output size along with frame rate and codec details, which makes it useful for rough email targets, though still not precise.
When you need CRF 22, a specific megabyte count, or batch processing, QuickTime is the wrong tool.
iMovie Share → File / Email: Resolution Presets Explained
iMovie is free and built in, and exports smaller files through Share → File or Share → Email with resolution and quality presets. The File route displays an estimated output size in the corner of the export dialog, which is enough for a rough cut. It is not built for precise size targets, and it offers no codec choice beyond what the presets imply.
Finder’s Encode Selected Video File Only Works on MOV
Finder’s right-click “Encode Selected Video File” is MOV-only and preset-limited — it will not help with MP4 or MKV files, so do not expect it to be a general-purpose compressor. Within that boundary it is fast and simple, letting you pick a resolution, convert to Apple ProRes, or extract audio only.
Note also where the file is headed. Editing pipelines often want MOV or ProRes, so exporting the delivery MP4 and keeping the MOV master is the correct split, not a compromise.
How to Compress a MOV File on Windows with HandBrake
HandBrake is the free, cross-platform default for MOV compression, and it is what most of the practical advice in this guide assumes.
HandBrake Settings for a MOV File: Fast 1080p30 + Constant Quality RF 20–23
Load the .mov into HandBrake, pick the Fast 1080p30 preset, then switch to the Video tab and set Constant Quality to RF 20–23 — RF 22 is the standard “preserve quality” choice. Set the container to MP4, choose an output location, and start the encode. A 4 GB 1080p source typically lands around 1.5–2 GB at CRF 22, though encoding speed depends heavily on your CPU.
Use the queue to batch-process dozens of clips instead of repeating the settings dialog. That is the workflow the 200-clip marketing case implies, and it is the difference between a one-off fix and a repeatable process. For whole libraries of mixed media, bulk resizing photos and videos with a privacy-first tool follows the same batch logic.
VLC’s Media → Convert/Save route works but cannot preview the output size before encoding, which makes it a fallback rather than a planning tool. For exact sizes and scripted batches, move up to FFmpeg; for clips already inside a timeline, Premiere Pro or DaVinci Resolve let you preview an estimated output size while you adjust encoder, bitrate, and resolution.
A Mac Screen Recording MOV on a Windows PC: What Changes
Cross-platform work exposes a gap most guides skip. A QuickTime screen recording made on a Mac plays on Windows only if the right codec is present, and installing playback patches treats the symptom. The cleaner fix is to transcode the file once to H.264 MP4 in HandBrake, which produces a file that plays natively and is already compressed to a sensible size.
Windows users also encounter the “saved movie” case — a .mov downloaded or exported from another app, with no QuickTime ecosystem around it at all. The same HandBrake workflow applies.
Online MOV Compressors: What the Free Tiers Actually Allow
Browser-based compressors are convenient, but their limits change frequently and competing sources contradict each other. Verify on the official page before relying on any number below.
The Dated Tool Comparison Table (Upload Cap, Watermark, Output, Privacy)
| Tool | Free upload cap | Watermark on free | Notes | Paid tier |
|---|---|---|---|---|
| ScreenApp | 2 GB | No | Encrypted in transit and at rest; no account required | $19/month annual |
| FreeConvert | 1 GB | Not stated | Supports target size, quality, resolution, max bitrate | $12.99/month |
| Clideo | 500 MB | Yes | No output format choice | Not stated |
| VEED | 1 GB | Yes | — | Not stated |
| Adobe Express | 1 GB | Not stated | 480p–4K output with a live size-estimate slider | Free plan available |
| FileReducer | Guest 50 MB / Free 100 MB / Pro 1 GB / Business 2 GB | No | Files deleted after 1 hour / 24 hours / 30 days by tier | Pro and Business |
| Ezgif | ~35 MB | No | Clip testing only | — |
| Clipchamp | Conflicting: 20 GB vs 500 MB | Not stated | Sources disagree — check the official page | — |
Caps and prices for ScreenApp, FreeConvert, Clideo, and VEED were checked by ScreenApp on 2026-09-12 and 2026-09-15. FileReducer’s tier structure and retention policy come from FileReducer (2026). Adobe Express supports files up to 1 GB with resolutions from 480p to 4K and updates an estimated output size as you move the compression slider — its example figures, such as turning a 1 GB drone video into a 90 MB MP4 or a 1 GB travel vlog into 180 MB, are vendor claims rather than independent tests.
Two caveats worth stating plainly. First, unsupported audio codecs and HDR can make browser-based paths fail even when the file is under the size cap. Second, some third-party sites point two different product names at the same Clideo URL, so treat naming as unreliable.
Why On-Device Compression Beats Uploading a 1 GB MOV
Local browser compression avoids uploading your footage at all. SqueezeVid processes MOV up to 2 GB on your device and outputs an H.264 MP4, with a separate 10 GB browser beta at original resolution and a 10 GB server-side channel when uploading is acceptable. It uses FFmpeg in the browser, and it warns that memory-only browsers cap outputs at 512 MiB.
The same source offers the most honest expectation-setting in this category: savings depend on the source video, duration, resolution, and bitrate, and already-compressed files may barely shrink.
How to Compress a MOV File to a Target Size (and Why Email Usually Fails)
Platform limits define the goal, so start there rather than at a quality setting. According to Uploadex, Gmail caps outbound attachments at 25 MB and Outlook at 20 MB.
The Target-Size Formula (With a Worked Example)
Target bitrate ≈ (target MB × 8 ÷ duration in seconds) − audio bitrate.
For a 95 MB target on a 5-minute (300-second) video: 95 × 8 ÷ 300 ≈ 2,530 kbps total. Subtract 128 kbps for audio, and you have roughly 2,400 kbps for video. The same arithmetic works for a 500 MB web-upload cap or a 100 MB WhatsApp limit — each one produces a completely different bitrate budget.
Two-Pass FFmpeg: Hitting an Exact Megabyte Count
CRF cannot target a byte count, so exact sizes require two-pass encoding. The first pass writes statistics to a log; the second pass uses them with the calculated bitrate:
ffmpeg -y -i input.mov -c:v libx264 -b:v 2400k -pass 1 -an -f null /dev/null
ffmpeg -i input.mov -c:v libx264 -b:v 2400k -pass 2 -c:a aac -b:a 128k output.mp4
Set expectations before you start encoding. If the file is only slightly over the limit, cut audio to 96–128 kbps and raise CRF by one or two points. If it is 40x over the limit, stop encoding and share a link instead — no quality-preserving compression turns a 4 GB MOV into an email attachment. As Surya Prakash of Uploadex notes: “If you’re compressing because you’re trying to email or share the file, compress less — or don’t compress at all — and use a file-sharing service with a download link.”
Lossless, Visually Lossless, or Visible? How Much Quality Loss Is Acceptable
Three tiers cover nearly every situation.
True lossless codecs such as FFV1, HuffYUV, and Lagarith are reversible, but their compression ratios are far lower than lossy codecs — converting an already-compressed H.265 file to a lossless format actually makes it much larger. They belong in source-footage archiving, not delivery.
Visually lossless is the practical target: CRF 18–22 for H.264, CRF 22–28 for H.265. These settings reduce file size considerably while producing output that looks identical to most viewers.
Visible loss begins around CRF 28+, where blocking appears in motion and banding shows up in gradients and dark scenes.
The rule that resolves most confusion: you can drop a high-bitrate source by around 80% without visible loss, but you cannot drop an already-compressed file by another 80%. As Uploadex puts it, there is no quality left to throw away.
VP9 and AV1 offer better efficiency than H.265, but with slower encodes and narrower device support. Treat them as an advanced option, not a default recommendation.
To judge your own output, pause on motion, dark, and gradient frames side by side. If you can spot the difference, back the CRF off by two points and re-run.
Zip vs. Re-encode: Why Your Archive Didn’t Shrink
Zipping a MOV does not meaningfully reduce it, because video is already compressed data — ZIP typically saves only a percent or two. Zip remains useful for bundling a master with project files — see how to zip a file on Mac and Windows — not for shrinking video.
Does Compressing a MOV Reduce Audio Quality?
Only if you lower the audio bitrate; the video codec you choose does not touch audio. AAC 128 kbps is fine for speech, while 192–256 kbps suits music-heavy content. Since audio is a small share of total size, cutting it rarely solves a size problem — keep it at 128 kbps minimum. Poor audio makes viewers perceive the video as worse than it actually is.
Compressed but Still Too Big? Diagnose It in This Order
Check 1 — did you actually re-encode, or just re-wrap? Remuxing a MOV into an MP4 container keeps the same bitrate and the same size. Codec is the lever that moves size; the container is cosmetic.
Check 2 — was the source already compressed? A 5 Mbps MOV has almost no headroom left. According to Uploadex, an already-compressed 5 Mbps source only reaches about 3 or 2 Mbps, with slight loss in busy scenes. Verify the input bitrate before assuming the tool failed.
Check 3 — did you change codec and CRF, or only the container and filename?
Check 4 — is your target a hard platform limit? Gmail’s 25 MB and Outlook’s 20 MB are hard constraints, not soft goals. If that is the destination, switch strategy to a share link instead of squeezing further — the same workaround that gets large files past Discord’s 20MB file limit.
Check 5 — are resolution and frame rate still untouched? Downscaling 4K to 1080p or 60 fps to 30 fps is the remaining lever once CRF and bitrate are optimized.
Check 6 — did the export silently fall back to a default preset? Confirm the output’s actual resolution, codec, and bitrate rather than trusting the filename.
Keep the Original as a Master: Verifying Your Compressed MOV
The compressed file is a delivery copy. Keep the untouched MOV master on separate storage so you never re-compress an already-compressed file. That is exactly how the 800 GB → 120 GB marketing team reduction worked: masters stayed on a backup drive while only delivery copies were re-encoded.
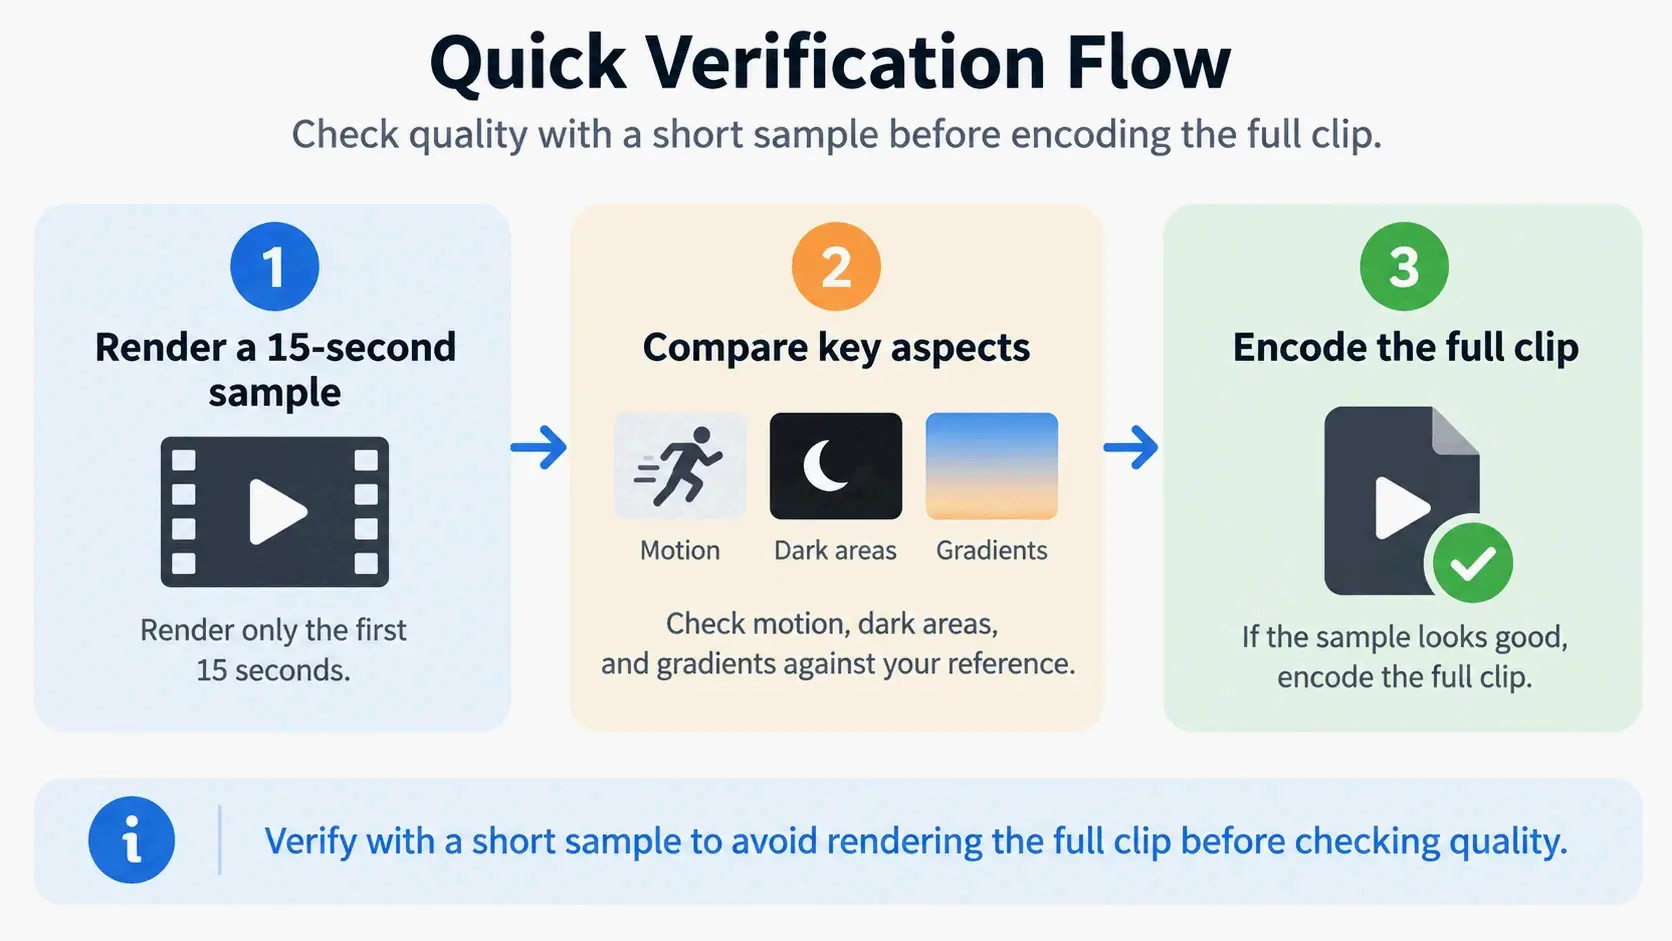
Verification follows four steps. Compress a 15-second sample of the busiest section at full resolution and watch it before rendering the whole clip. Compare motion, dark, and gradient scenes side by side, and if artifacts appear, raise quality by two CRF points and re-run. Check orientation on portrait footage and confirm small on-screen text is still readable. Then name the output with resolution, codec, and bitrate — product-demo_1080p_h264_8Mbps.mp4 — so a future replacement is a lookup rather than a guess.
Store masters and delivery copies in separate folders with different backup rules: masters get redundancy, copies get deleted after the campaign.
Conclusion
How to compress a MOV file comes down to knowing what is inside the container. Re-encode ProRes or high-bitrate footage to H.264 at CRF 22 — or H.265 when size matters more than compatibility — and keep the original as a master.
Diagnose your file first, pick the row in the decision table that matches your source and destination, run a 15-second sample, verify it at full size, then encode the full clip. HandBrake’s Fast 1080p30 preset with RF 20–23 handles most jobs; FFmpeg handles exact targets. And if the goal is a 25 MB email attachment, skip the squeeze entirely and send a share link.
FAQ
What is the best codec for compressing MOV files?
H.264 is best for maximum compatibility and playback everywhere. H.265 (HEVC) delivers the smallest file at the same quality, which matters most for 4K and long clips. The trade-off: H.265 encodes slower and older devices may not play it. ProRes is a source codec, not a delivery codec.
Should I convert MOV to MP4 when compressing?
Yes for sharing, uploading, and email-size targets — MP4 is the most portable container and adds no extra quality loss. Keep MOV if the file is going back into an edit timeline or needs ProRes-class intermediate handling. Container choice does not change file size by itself; the codec and bitrate do.
Can a MOV file be compressed without losing quality?
Truly lossless codecs such as FFV1, HuffYUV, and Lagarith barely shrink the file, so they are archive-only. Visually lossless is the practical answer: CRF 18–22 for H.264, 22–28 for H.265. High-bitrate sources can drop about 80% with no visible change; already-compressed files cannot.
Why is my compressed MOV file still too large?
The most common cause is that the source was already compressed, leaving little quality to remove. The second is remuxing rather than re-encoding, which leaves the bitrate unchanged. The third is a hard cap like Gmail’s 25 MB — that calls for a share link instead of more compression.
Does compressing a MOV file reduce audio quality?
Only if you lower the audio bitrate; the video codec you choose does not touch audio. AAC 128 kbps is usually enough for speech and screen recordings, while 192–256 kbps suits music. Audio is a tiny share of total size, so keep it at 128 kbps minimum rather than cutting it to solve a size problem.
Can I compress a MOV file on my phone?
Yes — phone-side editors and share-sheet compression options handle short clips, and cloud tools accept uploads up to their free-tier cap. Expect less control: no CRF setting, limited codec choice, and often forced downscaling. For a 1 GB+ MOV, a desktop tool like HandBrake gives far more control over size and quality.
Is zipping a MOV file an effective way to reduce its size?
No — video is already compressed data, so ZIP usually saves only a percent or two. Zip is useful for bundling a master with project files, not for shrinking video. If a MOV must get smaller, re-encode it to H.264 or H.265 instead.
SectoJoy
Let Compress publishes practical guides for compression, conversion, and browser-based file workflows.
Follow SectoJoy