How to Extract ZIP Files on Mac: Native & Terminal Methods (2026)
To extract a ZIP file on Mac, double-click the file in Finder — macOS uses the built-in Archive Utility to decompress it instantly into the same folder. For more control, use the Terminal command unzip filename.zip. For non-native formats like RAR and 7z, install a third-party tool like Bandizip or use a browser-based extractor.
Three Ways to Extract ZIP Files on Mac
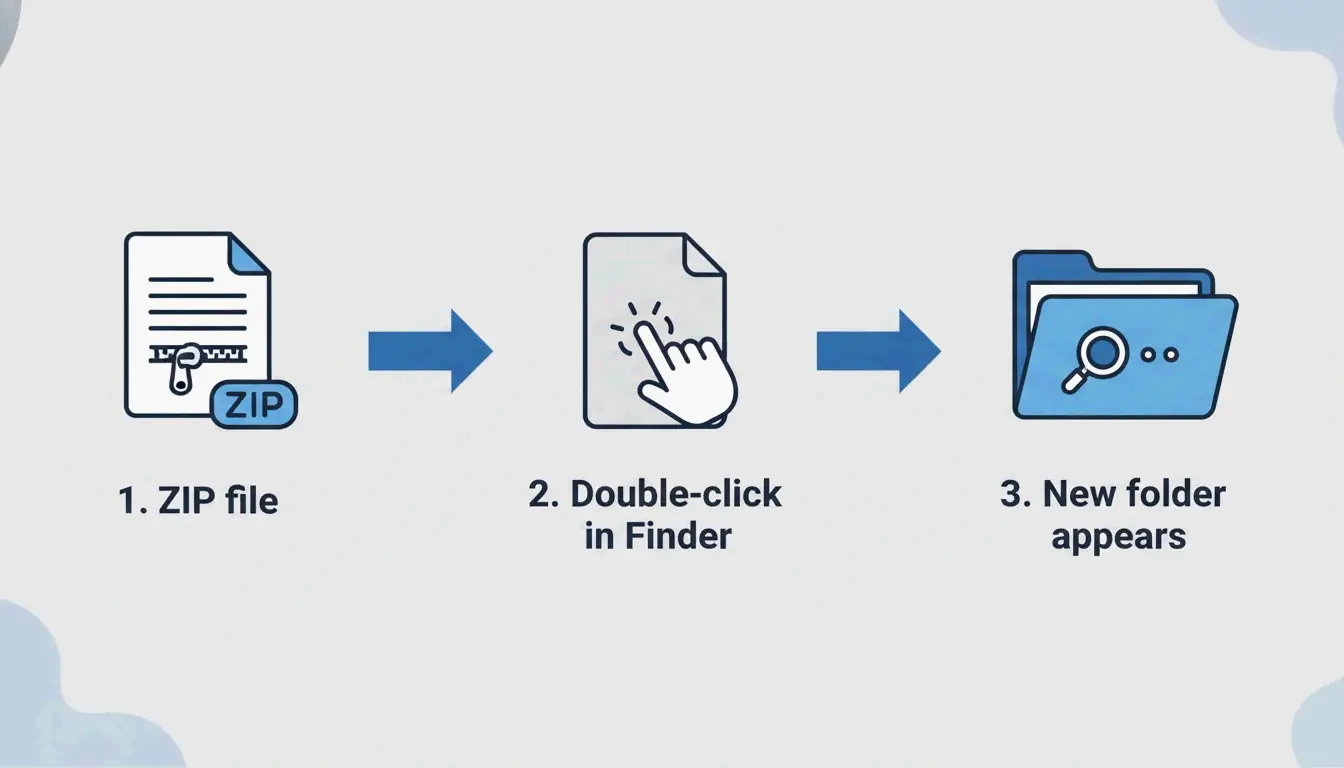
Method 1: Double-Click in Finder (Fastest)
macOS has native ZIP support — no extra apps needed. Double-click any ZIP file in Finder, and Archive Utility runs in the background, creating a new folder with the extracted contents in the same location.
This works on all modern macOS versions (Sonoma and later) and across all Apple Silicon hardware (M1, M2, M3, M4).
Method 2: Terminal Commands (For Power Users)
When Finder shows “Decompression Failed” or “Error 1” permission issues, Terminal is more reliable:
unzip filename.zip

# Extract to a specific folder
unzip filename.zip -d ~/Desktop/extracted/

# View contents without extracting
unzip -l filename.zip

# Extract password-protected ZIP
unzip -P yourpassword filename.zip
Expert Olga Weis recommends moving developer packages into a clean folder before unpacking: “This keeps extracted files from cluttering your Downloads folder.”
Method 3: Right-Click with Third-Party Tools
For formats beyond ZIP (RAR, 7z, TAR, GZIP), the built-in Archive Utility cannot help. Third-party apps add right-click extraction:
| Tool | Formats Supported | Key Feature | Price |
|---|---|---|---|
| Bandizip | 40+ (RAR5, ZIPX, 7z) | Multi-core processing for large files | Free |
| iBoysoft MagicMenu | ZIP, RAR, 7z | Right-click Finder integration | Paid |
| ZIP Extractor | ZIP, RAR, 7z | Browser-based, works in Google Drive | Free (300M+ users) |
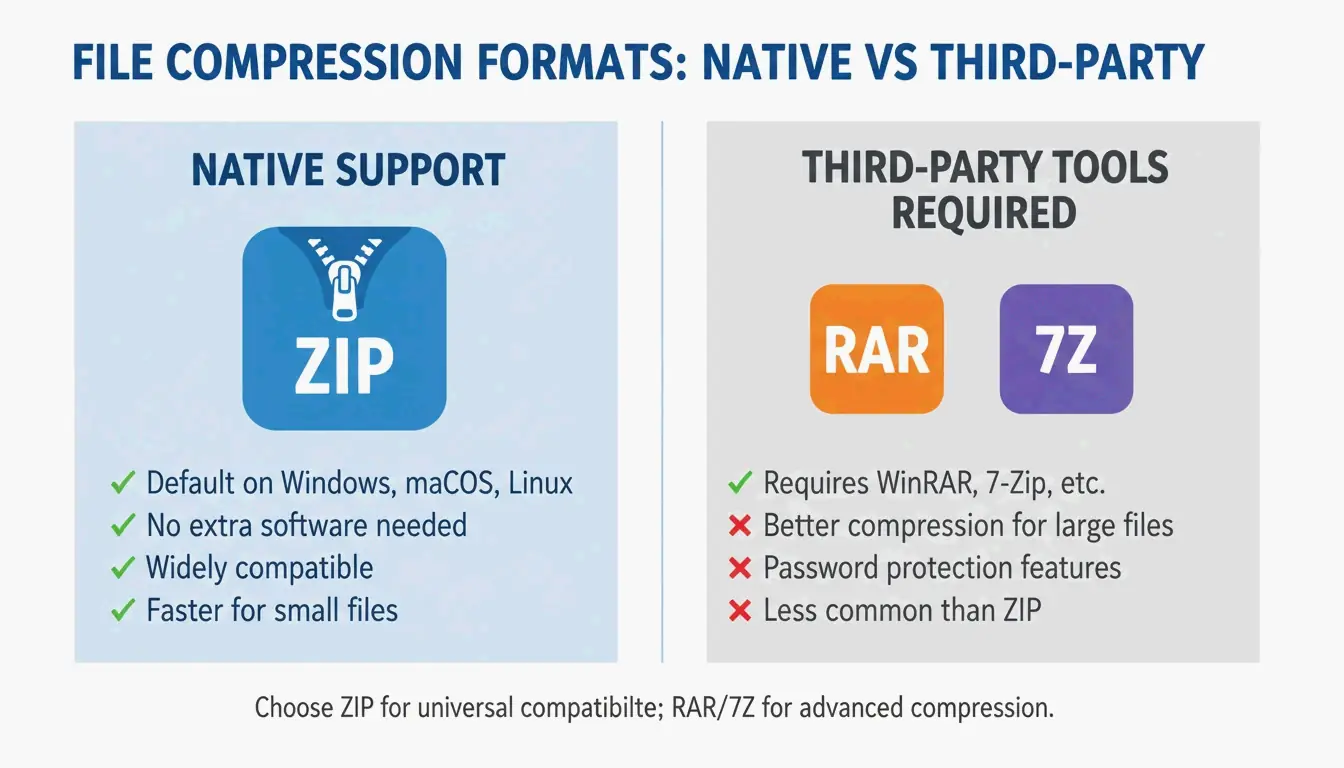
Format Support: What Mac Can and Cannot Open Natively
| Format | Finder (Native) | Terminal | Third-Party Needed? |
|---|---|---|---|
| ZIP | Yes | unzip |
No |
| TAR | No | tar -xf |
No |
| GZIP (.gz) | No | gunzip |
No |
| RAR | No | No | Yes |
| 7z | No | No (without p7zip) | Yes |
| ZIPX | No | No | Yes |
Safari Auto-Open: Convenience vs. Security
Safari can automatically unzip downloads: Safari → Settings → General → “Open ‘safe’ files after downloading.”
Recommendation: Keep this disabled. Auto-opening ZIP files can execute unknown scripts without your knowledge. Manually check downloaded files before extracting.
Troubleshooting: “Unable to Expand ZIP” Errors
| Error | Cause | Fix |
|---|---|---|
| “Decompression Failed” | Corrupted download | Re-download the file |
| “Error 1” (permission) | Protected folder or shared drive | Move ZIP to Desktop or Documents |
| “No space left on device” | Insufficient disk space | Free up storage; extracted files are larger than the ZIP |
| “Unable to expand” (encrypted) | Password-protected archive | Use Terminal: unzip -P password filename.zip |
Always verify disk space before extracting large archives — uncompressed files can be significantly larger than the ZIP.
Conclusion
Double-clicking in Finder handles 95% of ZIP extraction needs on Mac. For errors and advanced control, use Terminal unzip commands. For RAR, 7z, and other non-native formats, install Bandizip or use ZIP Extractor in your browser. Keep Safari’s auto-open disabled for security, and always extract to a dedicated folder to stay organized.
FAQ
Where is the ‘Unzip’ app on a Mac?
There is no standalone app. Archive Utility runs automatically when you double-click a ZIP file. You can also right-click → “Open With → Archive Utility.”
How do I automatically unzip Safari downloads?
Go to Safari → Settings → General and check “Open ‘safe’ files after downloading.” This auto-decompresses ZIP files. Disable this for better security if you download from untrusted sources.
How do I extract a password-protected ZIP on Mac?
Double-clicking usually shows a password prompt. If it does not, use Terminal: unzip -P yourpassword filename.zip. Replace yourpassword with the actual password and filename.zip with your file name.
SectoJoy
Let Compress publishes practical guides for compression, conversion, and browser-based file workflows.
Follow SectoJoy