مییک پر ZIP فائلیں کیسے نکالیں: مقامی اور ٹرمینل طریقے (2026)
مییک پر ZIP فائل نکالنے کے لیے، بس Finder میں فائل پر ڈبل کلک کریں — macOS اندرونی Archive Utility استعمال کرتا ہے تاکہ اسے فوری طور پر اسی فولڈر میں ڈی کمپریس کر دے۔ زیادہ کنٹرول کے لیے، Terminal کمانڈ unzip filename.zip استعمال کریں۔ RAR اور 7z جیسی غیر مقامی فارمیٹس کے لیے، Bandizip جیسا کوئی تھرڈ پارٹی ٹول انسٹال کریں یا براؤزر پر مبنی استخراج کنندہ استعمال کریں۔
مییک پر ZIP فائلیں نکالنے کے تین طریقے
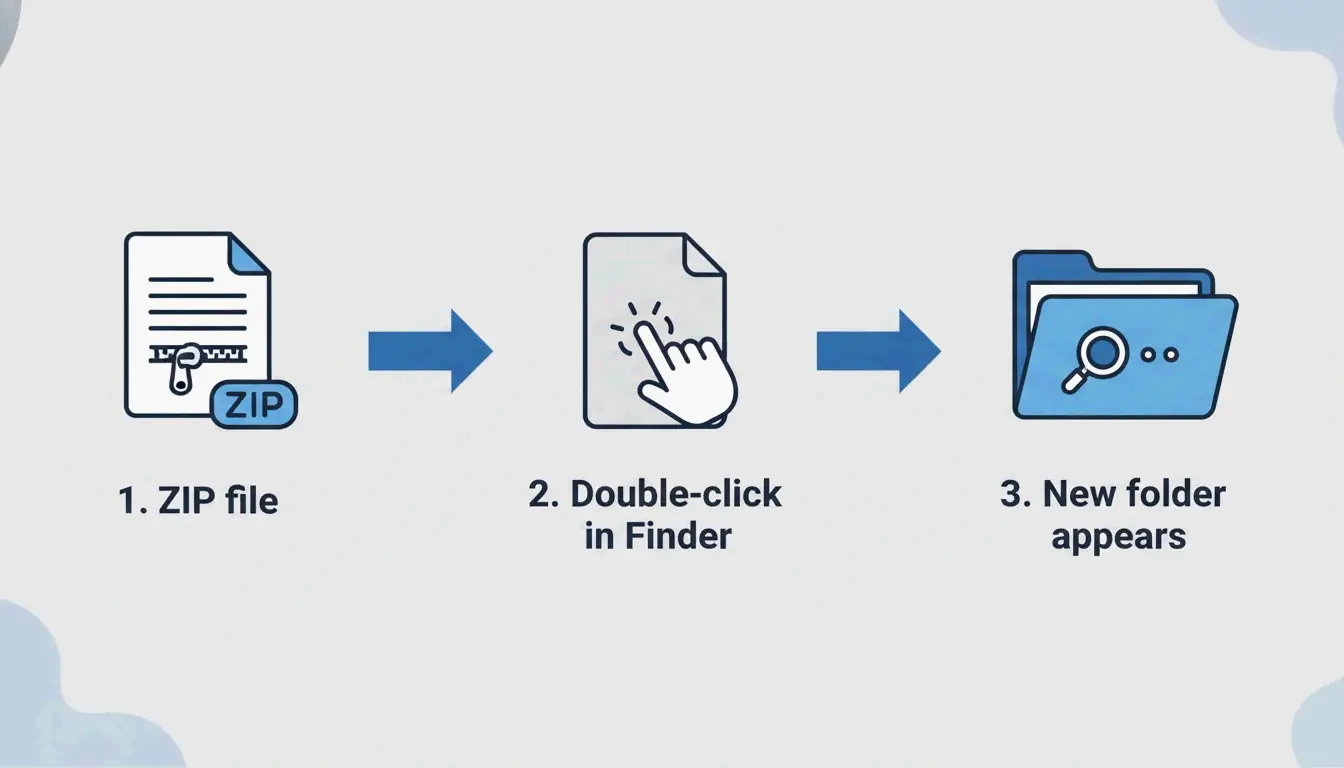
طریقہ 1: Finder میں ڈبل کلک (تیز ترین)
macOS مقامی طور پر ZIP کی سپورٹ کرتا ہے — کوئی اضافی ایپس درکار نہیں۔ Finder میں کسی بھی ZIP فائل پر ڈبل کلک کریں، اور Archive Utility پس منظر میں چل کر اسی مقام پر نکلی ہوئی مواد کے ساتھ نیا فولڈر بناتا ہے۔
یہ تمام جدید macOS ورژنز (Sonoma اور بعد) اور تمام Apple Silicon ہارڈویئر (M1، M2، M3، M4) پر کام کرتا ہے۔
طریقہ 2: Terminal کمانڈز (پاور یوزرز کے لیے)
جب Finder «Decompression Failed» یا «Error 1» اجازت کے مسائل دکھاتا ہے، تو Terminal زیادہ قابلِ اعتماد ہے:
unzip filename.zip

unzip filename.zip -d ~/Desktop/extracted/

# View contents without extracting
unzip -l filename.zip

# Extract password-protected ZIP
unzip -P yourpassword filename.zip
ماہر Olga Weis ڈی کمپریس کرنے سے پہلے ڈویلپر پیکیجز کو صاف فولڈر میں منتقل کرنے کی سفارش کرتی ہے: «اس سے نکلی ہوئی فائلیں آپ کے ڈاؤن لوڈ فولڈر کو بھری ہوئی نہیں کرتیں۔»
طریقہ 3: تھرڈ پارٹی ٹولز کے ساتھ دائیں کلک
ZIP سے آگے کے فارمیٹس (RAR، 7z، TAR، GZIP) کے لیے، اندرونی Archive Utility مدد نہیں کر سکتا۔ تھرڈ پارٹی ایپس دائیں کلک سے استخراج کی سہولت شامل کرتی ہیں:
| ٹول | معاون فارمیٹس | اہم فیچر | قیمت |
|---|---|---|---|
| Bandizip | 40+ (RAR5، ZIPX، 7z) | بڑی فائلوں کے لیے ملٹی کور پروسیسنگ | مفت |
| iBoysoft MagicMenu | ZIP، RAR، 7z | Finder میں دائیں کلک انٹیگریشن | ادا (Paid) |
| ZIP Extractor | ZIP، RAR، 7z | براؤزر پر مبنی، Google Drive میں کام کرتا ہے | مفت (30 کروڑ سے زائد صارفین) |
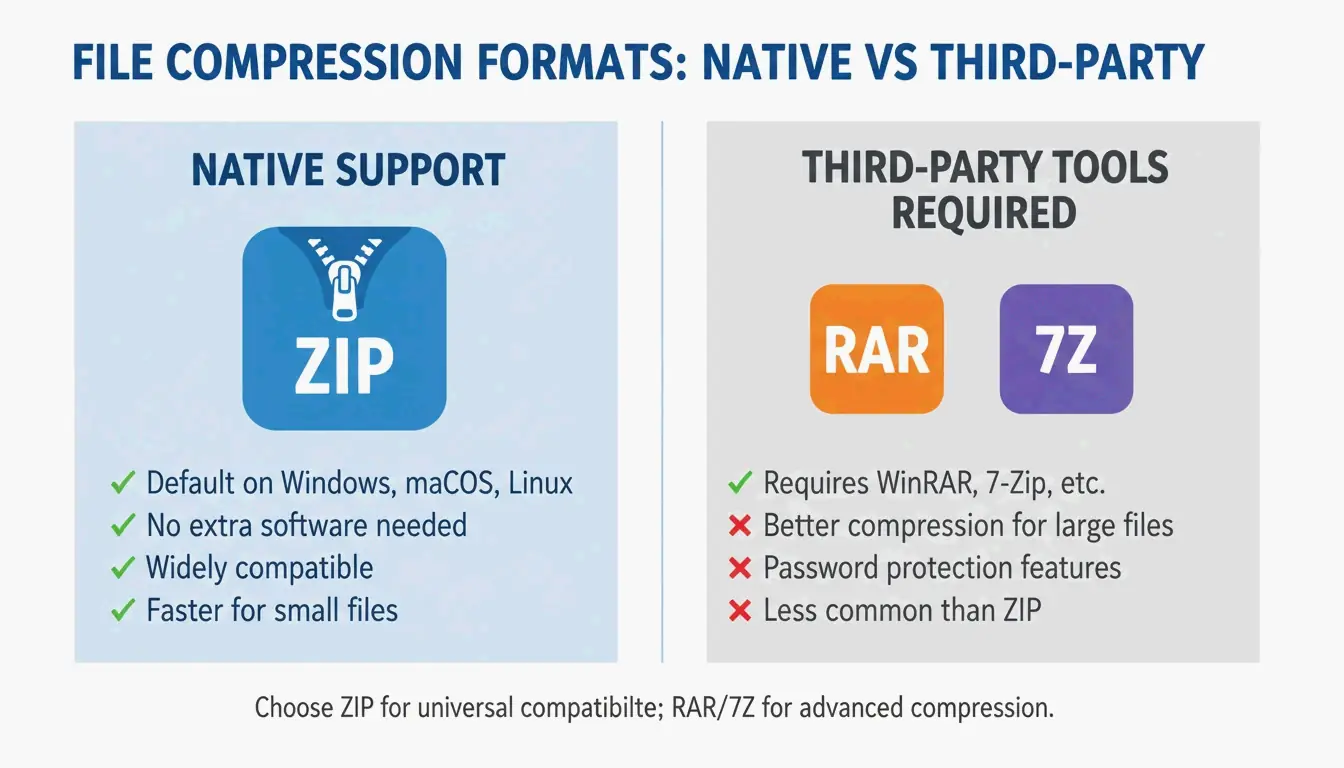
فارمیٹ سپورٹ: مییک مقامی طور پر کیا کھول سکتا ہے اور کیا نہیں
| فارمیٹ | Finder (مقامی) | Terminal | تھرڈ پارٹی درکار؟ |
|---|---|---|---|
| ZIP | ہاں | unzip |
نہیں |
| TAR | نہیں | tar -xf |
نہیں |
| GZIP (.gz) | نہیں | gunzip |
نہیں |
| RAR | نہیں | نہیں | ہاں |
| 7z | نہیں | نہیں (p7zip کے بغیر) | ہاں |
| ZIPX | نہیں | نہیں | ہاں |
Safari خودکار کھولنا: سہولت بمقابلہ سیکیورٹی
Safari ڈاؤن لوڈز کو خود بخود ڈی کمپریس کر سکتا ہے: Safari → سیٹنگز (Settings) → جنرل → «ڈاؤن لوڈ کے بعد “محفوظ” فائلیں کھولیں»۔
سفارش: اسے بند رکھیں۔ ZIP فائلوں کو خود بخود کھولنا آپ کی علم کے بغیر نامعلوم اسکرپٹس چلا سکتا ہے۔ استخراج سے پہلے ڈاؤن لوڈ کردہ فائلوں کو دستی طور پر چیک کریں۔
مسئلہ حل: «Unable to Expand ZIP» غلطیاں
| غلطی | وجہ | حل |
|---|---|---|
| «Decompression Failed» | خراب ڈاؤن لوڈ | فائل دوبارہ ڈاؤن لوڈ کریں |
| «Error 1» (اجازت) | محفوظ فولڈر یا شیئرڈ ڈرائیو | ZIP کو ڈیسک ٹاپ یا دستاویزات میں منتقل کریں |
| «No space left on device» | ناکافی ڈسک جگہ | اسٹوریج خالی کریں؛ نکلی ہوئی فائلیں ZIP سے بڑی ہوتی ہیں |
| «Unable to expand» (انکرپٹڈ) | پاس ورڈ سے محفوظ آرکائیو | Terminal استعمال کریں: unzip -P password filename.zip |
بڑی آرکائیوز نکالنے سے پہلے ہمیشہ ڈسک جگہ کی تصدیق کریں — غیر کمپریسڈ فائلیں ZIP سے کافی بڑی ہو سکتی ہیں۔
نتیجہ
Finder میں ڈبل کلک مییک پر ZIP استخراج کی ضروریات کا 95% حصہ پورا کرتا ہے۔ غلطیوں اور جدید کنٹرول کے لیے، Terminal کمانڈز unzip استعمال کریں۔ RAR، 7z اور دیگر غیر مقامی فارمیٹس کے لیے، Bandizip انسٹال کریں یا اپنے براؤزر میں ZIP Extractor استعمال کریں۔ سیکیورٹی کے لیے Safari کا خودکار کھولنا بند رکھیں، اور منظم رہنے کے لیے ہمیشہ مخصوص فولڈر میں استخراج کریں۔
اکثر پوچھے جانے والے سوالات
مییک پر «Unzip» ایپ کہاں ہے؟
کوئی الگ ایپ نہیں ہے۔ ZIP فائل پر ڈبل کلک کرنے پر Archive Utility خود بخود چلتا ہے۔ آپ دائیں کلک → «Open With → Archive Utility» بھی کر سکتے ہیں۔
میں Safari ڈاؤن لوڈز کو خود بخود کیسے ڈی کمپریس کروں؟
Safari → سیٹنگز (Settings) → جنرل پر جائیں اور «ڈاؤن لوڈ کے بعد “محفوظ” فائلیں کھولیں» کو منتخب کریں۔ یہ ZIP فائلوں کو خود بخود ڈی کمپریس کرتا ہے۔ اگر آپ غیر قابلِ اعتماد ذرائع سے ڈاؤن لوڈ کرتے ہیں تو بہتر سیکیورٹی کے لیے اسے بند کریں۔
میں مییک پر پاس ورڈ سے محفوظ ZIP کیسے نکالوں؟
ڈبل کلک عام طور پر پاس ورڈ کا اشارہ دکھاتا ہے۔ اگر نہیں دکھاتا، تو Terminal استعمال کریں: unzip -P yourpassword filename.zip۔ yourpassword کو اصل پاس ورڈ سے اور filename.zip کو اپنی فائل کے نام سے بدلیں۔
SectoJoy
Let Compress publishes practical guides for compression, conversion, and browser-based file workflows.
Follow SectoJoy