How to Zip a File on Mac and Windows: Complete Step-by-Step Guide (2026)
To zip files on Windows, right-click your selection in File Explorer and choose “Compress to ZIP file” (Windows 11) or “Send to > Compressed folder” (Windows 10). On Mac, right-click and select “Compress” via the built-in Archive Utility. No third-party software needed for basic compression.
Quick Reference: Zip Files by OS
| OS | Method | Steps |
|---|---|---|
| Windows 11 | File Explorer → Right-click | Select files → Compress to ZIP file |
| Windows 10 | File Explorer → Right-click | Select files → Send to > Compressed (zipped) folder |
| macOS | Finder → Right-click | Select items → Compress “[Name]” |
| Windows (batch) | PowerShell | Compress-Archive -Path "C:\Source\*" -DestinationPath "C:\Backup.zip" |
How to Zip Files on Windows
Windows 11
- Open File Explorer and select your files or folders
- Right-click the selection
- Click “Compress to ZIP file”
- A ZIP file appears in the same folder
Windows 10
- Select your files in File Explorer
- Right-click → Send to → Compressed (zipped) folder
- Rename the ZIP if needed
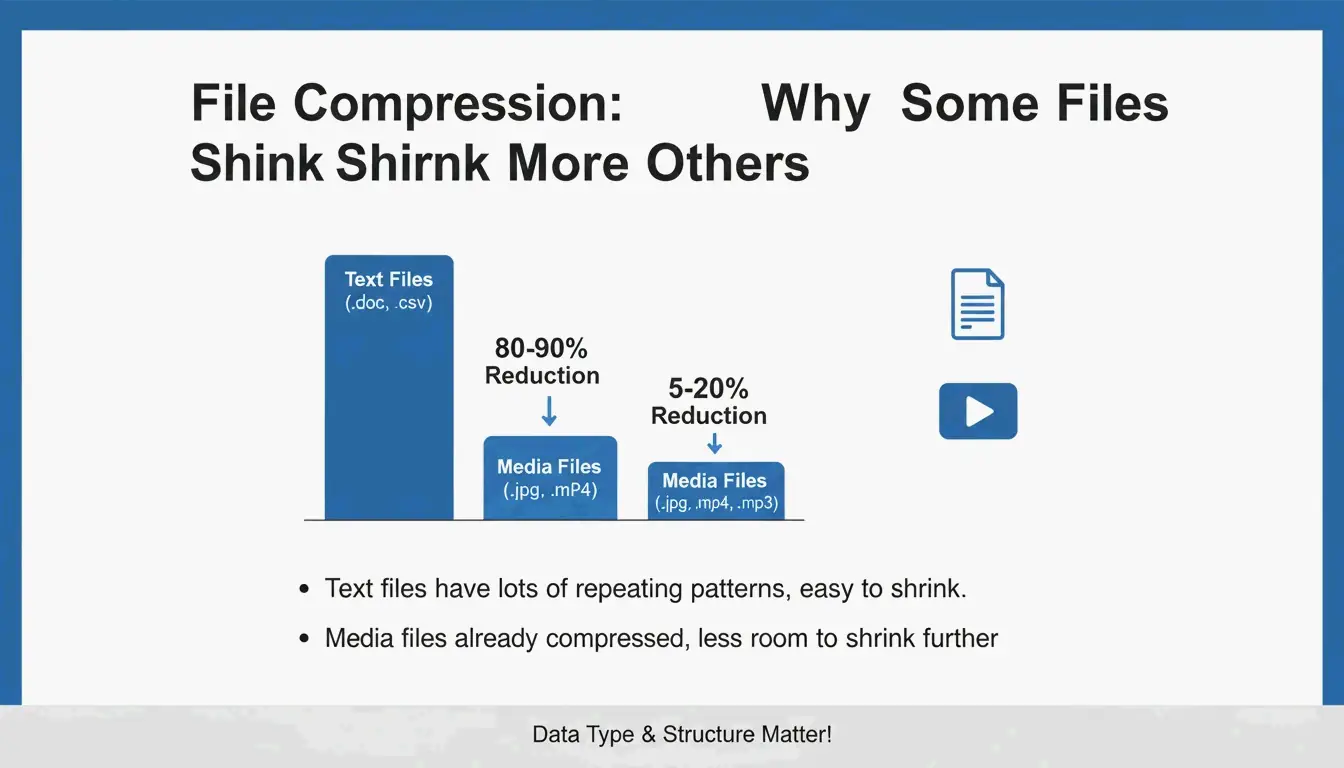
Compression Ratios by File Type
PalmGear provides useful benchmarks:
| File Type | Typical Compression | Why |
|---|---|---|
| Text (.txt, .html, .csv) | 60–80% | Highly repetitive data compresses well |
| Documents (.docx, .xlsx) | 30–50% | Partially compressed already |
| Images (.jpg, .png) | Less than 5% | Already compressed by their own codecs |
| Video (.mp4, .mov) | Less than 2% | Already compressed |
| RAW / uncompressed | 40–70% | Full data available for compression |
ZIP uses the Deflate algorithm — a lossless method. Your files remain identical after extraction.
PowerShell Batch Compression
Compress-Archive -Path "C:\Source\*" -DestinationPath "C:\Backup.zip" -CompressionLevel Optimal

# Fast compression (larger file, quicker)
Compress-Archive -Path "C:\Source\*" -DestinationPath "C:\Backup.zip" -CompressionLevel Fastest

# Append files to existing archive
Compress-Archive -Path "C:\NewFiles\*" -Update -DestinationPath "C:\Backup.zip"
A technician saved 39.5 minutes by zipping 200 driver files into one package for a 30-second upload, per PalmGear.
Archive Verification
Always double-click your new ZIP to verify files open correctly before deleting originals. This “archive hygiene” step prevents data loss.
How to Zip Files on Mac
Using Finder (Built-in)
- Select files or folders in Finder
- Right-click (or Control-click) → “Compress [Name]”
- An
Archive.zipfile appears (or named after selection if single item)
macOS uses Archive Utility — built directly into Finder, no extra apps needed.
ZIP64 Support
Modern macOS handles ZIP64 extensions, supporting archives beyond the old 4 GiB limit. ZIP64 technically allows up to 16 EiB per Wikipedia.
Terminal Alternative: ditto
For reliable large-archive creation:
ditto -c -k --sequesterRsrc --keepParent src_directory archive.zip
Naming Best Practices
Avoid generic names like archive.zip. Use descriptive labels:
PROJECT_ClientName_2026.zip
Photos_Vacation_2026-05.zip
Backup_Financial_Q1.zip
Password Protection with 7-Zip (AES-256)
Neither Windows nor Mac built-in tools support password-protected ZIP files. For encryption, use 7-Zip:
- Download and install 7-Zip
- Right-click files → 7-Zip > Add to archive
- In the Encryption section, enter a password
- Select AES-256 encryption
- Click OK
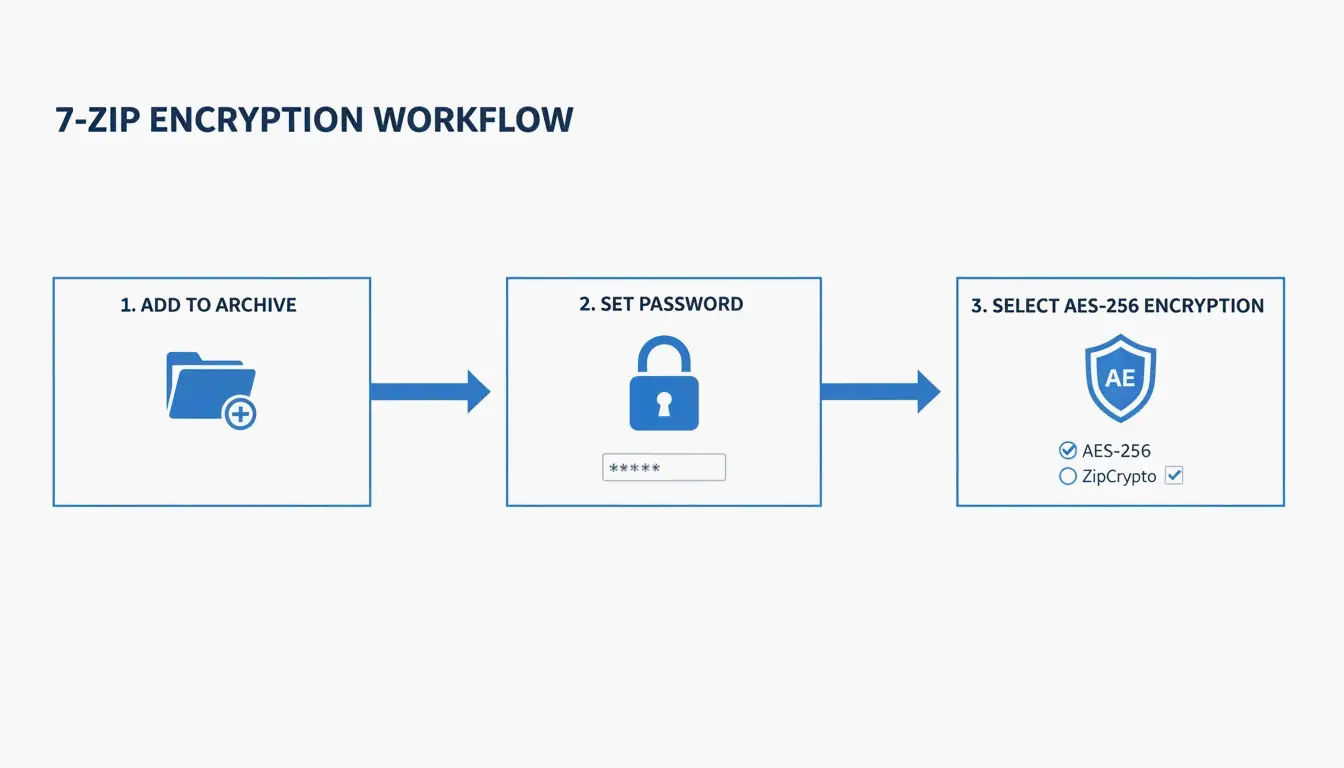
ZIP Extractor explains: even if someone intercepts your file during a cloud transfer, AES-256 ensures they cannot access the data without the password.
Format Comparison: ZIP vs. RAR vs. 7z
| Format | Native Support (Win/Mac) | Compression | AES-256 | Max Size | Best For |
|---|---|---|---|---|---|
| ZIP | Both | Good | Requires 7-Zip | 16 EiB (ZIP64) | Universal sharing |
| RAR | Neither | Better | Built-in | 16 EiB | High compression, recovery records |
| 7z | Neither | Best (LZMA2) | Built-in | 16 EiB | Maximum compression |
Unzipping: The Reverse Process
| OS | Method |
|---|---|
| Windows | Right-click ZIP → “Extract All” → choose destination |
| Mac | Double-click the ZIP — Archive Utility extracts automatically |
Safari auto-unzip: If files unzip automatically when downloaded, disable at Safari → Settings → General → uncheck “Open safe files after downloading.”
Conclusion
Zipping files is a core 2026 data management skill. Use File Explorer (Windows) or Archive Utility (Mac) for everyday compression. For sensitive data, use 7-Zip with AES-256. For batch jobs, use PowerShell (Windows) or Terminal ditto (Mac). Always verify archives before deleting originals.
FAQ
Can I password-protect a ZIP without third-party software?
No. Neither Windows File Explorer nor Mac Archive Utility supports password protection. Use 7-Zip (free) to apply AES-256 encryption.
Why is my ZIP the same size as the original?
This happens when the folder contains already-compressed files (JPG, MP4, PDF). The Deflate algorithm cannot further reduce these files — expect less than 5% savings.
Does macOS automatically unzip downloads?
Safari has “Open safe files after downloading” enabled by default. Disable it at Safari → Settings → General to prevent automatic unzipping.
What is the difference between ZIP, RAR, and 7z?
ZIP — Universal compatibility, built into Windows and Mac. RAR — Better compression, requires WinRAR. 7z — Best compression (LZMA2), requires 7-Zip. Both RAR and 7z support built-in AES-256 encryption.
SectoJoy
Let Compress publishes practical guides for compression, conversion, and browser-based file workflows.
Follow SectoJoy