কীভাবে JPG কম্প্রেস করবেন: গুণমান না হারিয়ে ফাইল সাইজ কমানোর সম্পূর্ণ গাইড (2026)
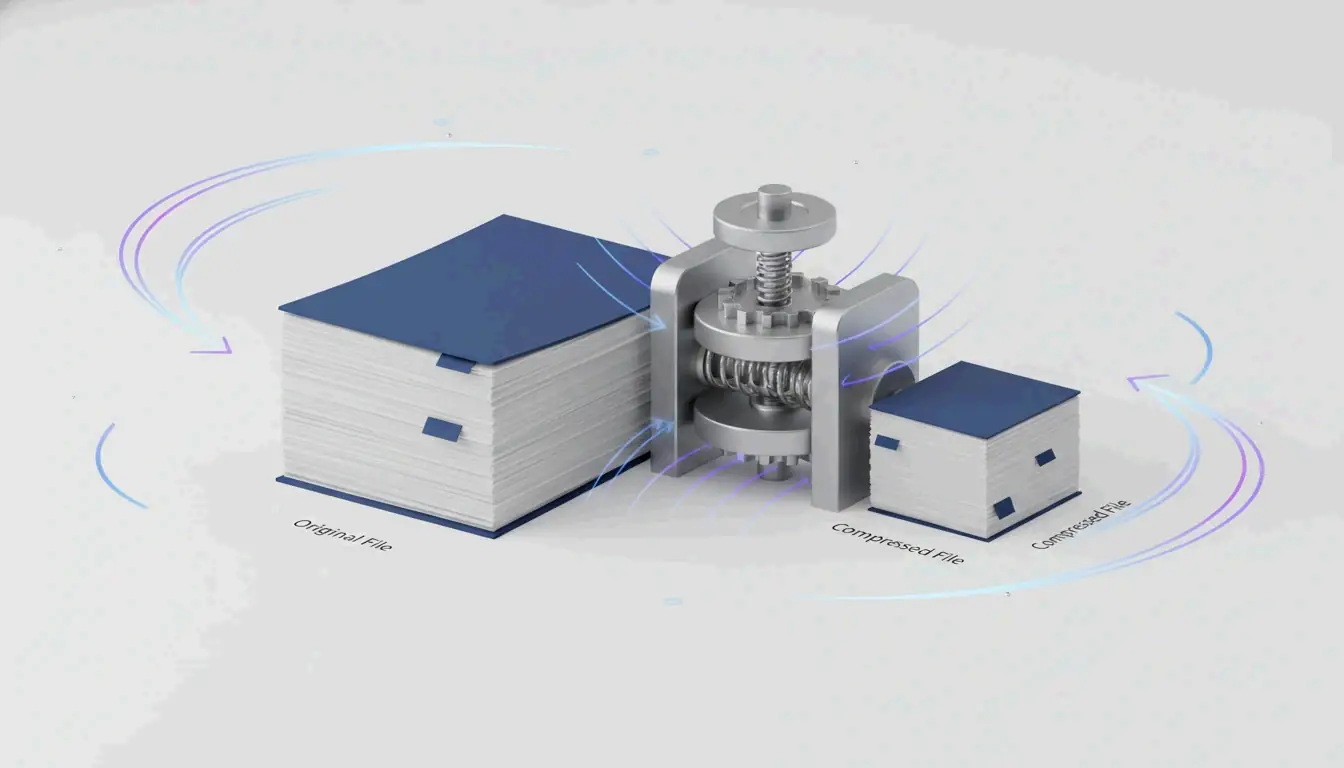
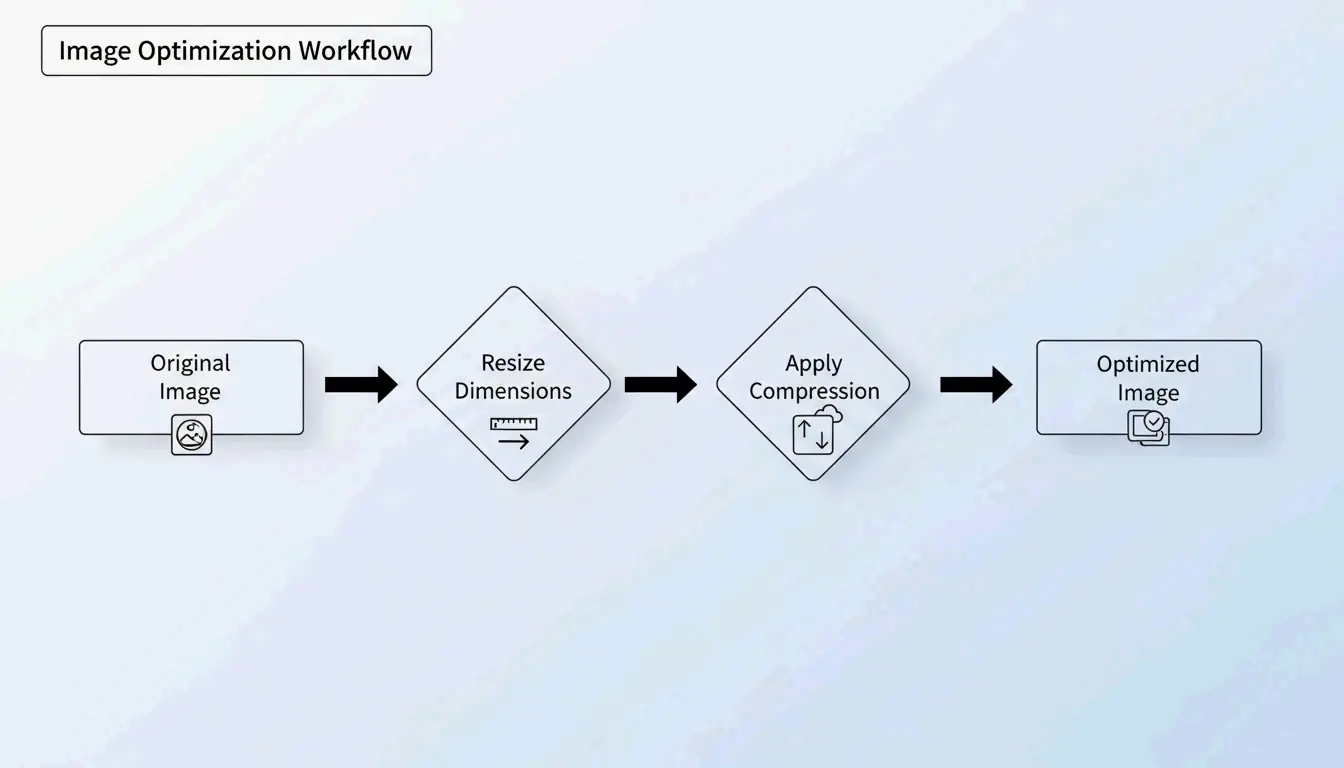
JPG কম্প্রেস করার সবচেয়ে কার্যকর উপায় হলো একটি দুই ধাপের প্রক্রিয়া: প্রথমে আপনার প্রদর্শনের প্রয়োজন অনুযায়ী ছবির ডাইমেনশন রিসাইজ করুন, তারপর 75–85% কোয়ালিটিতে লসি কম্প্রেশন প্রয়োগ করুন। এই পদ্ধতিটি ফাইল সাইজ 98% পর্যন্ত কমাতে পারে — 5MB থেকে 100KB — অথচ খালি চোখে ছবি তীক্ষ্ণ থাকবে, ShortPixel-এর মতে।
“আগে রিসাইজ, তারপর কম্প্রেস” প্রোটোকল
আপনি যদি একটি বিশাল 5MB ছবিকে ডাইমেনশন না বদলেই কম্প্রেস করেন, তাহলে ফলাফল প্রায়শই ঝাপসা বা পিক্সেলযুক্ত হয়। পেশাদাররা দুটি ভেরিয়েবল আলাদাভাবে সামলে এই সমস্যা এড়ান:
- রিসাইজ — আসল প্রদর্শন সাইজের সাথে মেলাতে পিক্সেল ডাইমেনশন কমান
- কম্প্রেস — 75–85% কোয়ালিটিতে লসি গুণমান হ্রাস প্রয়োগ করুন
কেন আগে রিসাইজ করবেন?
আপনার ওয়েবসাইট যদি একটি ছবিকে 1200px প্রস্থে প্রদর্শন করে, তাহলে 4000px আসল ছবি আপলোড করা ব্যান্ডউইথ নষ্ট করে এমন “ভূত পিক্সেলে” যা কেউ দেখে না। আগে রিসাইজ করলে কম্প্রেশন অ্যালগরিদম তার শক্তি দৃশ্যমান ডেটাতে কেন্দ্রিত করতে পারে।
ShortPixel প্রদর্শন করেছে যে একটি 5MB ছবি রিসাইজ করে কম্প্রেস করলে তা 100KB-এ নেমে আসে — 98% হ্রাস — অথচ দৃশ্যগতভাবে তীক্ষ্ণ থাকে।
লসি কম্প্রেশন কীভাবে কাজ করে: DCT সহজ ভাষায়
JPG কম্প্রেশন নির্ভর করে Discrete Cosine Transform (DCT)-এর উপর। অ্যালগরিদমটি ছবিকে 8×8 পিক্সেল ব্লকে ভাগ করে এবং দৃশ্যমান ডেটাকে ফ্রিকোয়েন্সি কম্পোনেন্টে রূপান্তর করে। এরপর এটি উচ্চ-ফ্রিকোয়েন্সি বিস্তারিত — সূক্ষ্ম রঙের পরিবর্তন যা আপনার চোখ উপেক্ষা করে — গোল করে ফেলে জায়গা বাঁচাতে।
GWAA ব্যাখ্যা করেছেন, 75–85% কোয়ালিটি রেঞ্জ ওয়েব ব্যবহারের জন্য আদর্শ পয়েন্ট:
| কোয়ালিটি সেটিং | ফাইল সাইজ হ্রাস | দৃশ্যমান প্রভাব |
|---|---|---|
| 90–100% | সামান্য (10–20%) | কার্যত কোনো দৃশ্যমান পার্থক্য নেই |
| 75–85% | 40–70% | পাশাপাশি তুলনা ছাড়া কদাচিৎ বোঝা যায় |
| 50–70% | 70–85% | সামান্য নরম, থাম্বনেইলের জন্য গ্রহণযোগ্য |
| 30–40% | 85–95% | দৃশ্যমান আর্টিফ্যাক্ট, শুধু কঠোর আপলোড সীমার জন্য |

2026-এ JPG কম্প্রেস করার সেরা টুল
অনলাইন টুল
| টুল | যার জন্য সেরা | মূল ফিচার | প্রাইভেসি |
|---|---|---|---|
| TinyIMG | Shopify স্টোর, বাল্ক ওয়েব ব্যবহার | AI-চালিত, 98% পর্যন্ত হ্রাস | সার্ভার-সাইড |
| ShortPixel | WordPress সাইট, ডেভেলপার | API + প্লাগইন, ব্যাচ প্রসেসিং | সার্ভার-সাইড |
| AllImageTools | প্রাইভেসি-অগ্রাধিকার কম্প্রেশন | ক্লায়েন্ট-সাইড প্রসেসিং (কখনো আপলোড হয় না) | শুধু ব্রাউজার |
| GWAA | দ্রুত একক কম্প্রেশন | কোনো অ্যাকাউন্ট লাগে না | সার্ভার-সাইড |
নেটিভ ডেস্কটপ টুল
- Windows: Photos অ্যাপ খুলুন → “Resize image” → কোয়ালিটি স্লাইডার সমন্বয় করুন
- Mac: Preview খুলুন → Tools → Adjust Size → রেজোলিউশন ও কোয়ালিটি কমান
ডেভেলপারদের জন্য: ImageMagick
Bitget Academy ব্যাচ প্রসেসিংয়ের জন্য ImageMagick সুপারিশ করে:
convert input.jpg -quality 85 output.jpg

mogrify -quality 85 -path ./optimized/ *.jpg
অতিরিক্ত সাশ্রয়ের জন্য EXIF মেটাডেটা সরান
প্রতিটি JPG-তে লুকানো EXIF মেটাডেটা থাকে — ক্যামেরা সেটিংস, তারিখ, GPS কোঅর্ডিনেট। ওয়েবসাইটের জন্য এগুলো বোঝা। আপনার কম্প্রেশন টুলে “Keep Exif” আনচেক করুন একটিও পিক্সেল না বদলেই প্রতিটি ছবিতে কয়েকটি অতিরিক্ত KB বাঁচাতে।
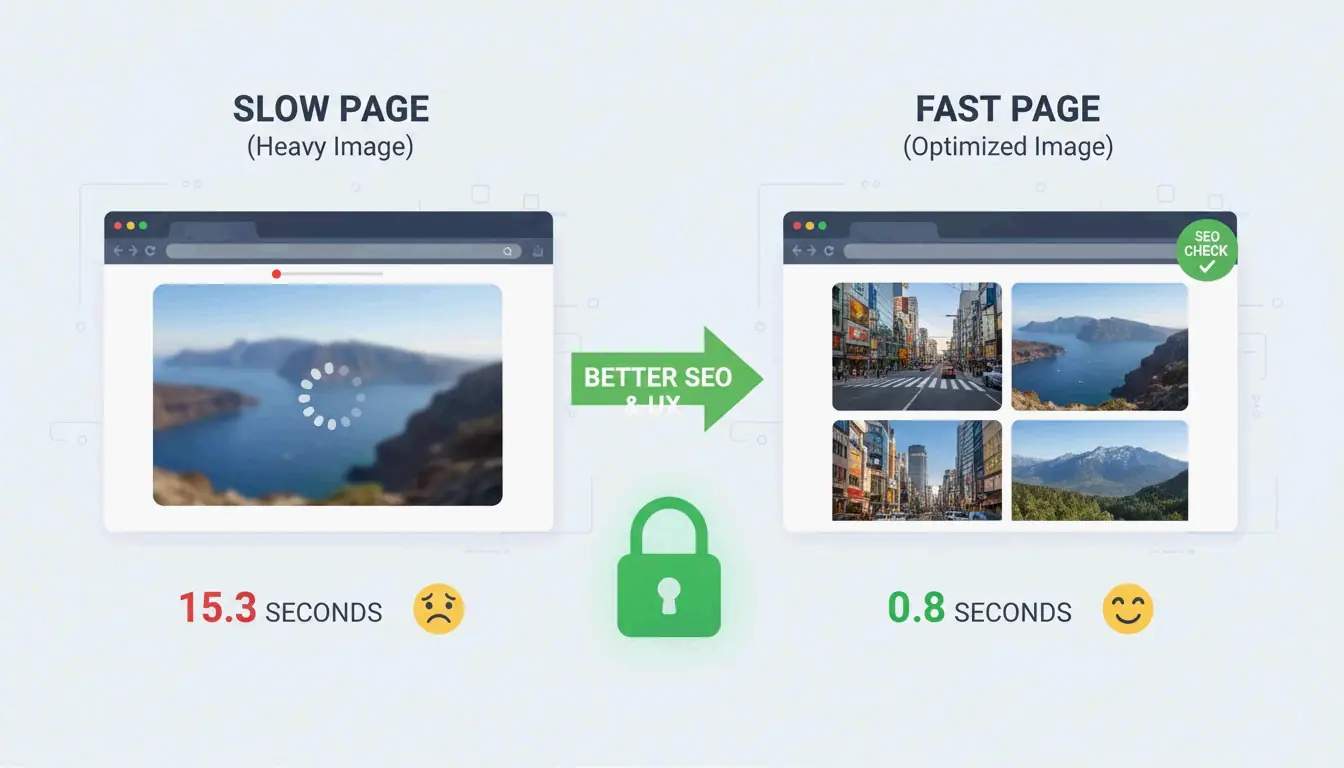
SEO প্রভাব: Core Web Vitals এবং ছবির ওজন
ছবির ফাইল সাইজ হলো #1 কারণ যা সাইটগুলিকে Largest Contentful Paint (LCP) টেস্টে ব্যর্থ করে — এটি একটি Core Web Vitals মেট্রিক যা Google র্যাঙ্কিংয়ের জন্য ব্যবহার করে।
- মোবাইল ব্যবহারকারীর 53% এমন সাইট ছেড়ে চলে যায় যা লোড হতে 3 seconds-এর বেশি সময় নেয় (AllImageTools)
- WebP এবং AVIF ফরম্যাট সমান গুণমানে JPEG-এর চেয়ে 25–34% ছোট (Google Developers)
2026 SEO-এর জন্য, হিরো ছবিগুলি 200KB-এর নিচে এবং সাধারণ কনটেন্ট ছবিগুলি 100KB-এর নিচে কম্প্রেস করুন।
সমস্যা সমাধান: যখন আপনার JPG এখনও অনেক বড়
আপনার যদি একটি কঠোর সীমায় পৌঁছাতে হয় (যেমন, সরকারি ফর্মের জন্য 100KB):
- কোয়ালিটি স্লাইডার 30–40%-এ নামিয়ে আনুন — কিছু নয়েজ দেখতে পাবেন, কিন্তু ফাইল নাটকীয়ভাবে ছোট হবে
- কখনোই কম্প্রেস করা JPG পুনরায় কম্প্রেস করবেন না — এতে “জেনারেশন লস” হয়, যা গুণমান সূচকীয়ভাবে নষ্ট করে। সর্বদা আসল থেকে শুরু করুন
- AI নিউরাল কম্প্রেশন চেষ্টা করুন — Nero AI এবং TinyIMG-এর মতো টুল শুধু সেখানে বিস্তারিত সরায় যেখানে মানুষের চোখ সবচেয়ে কম সংবেদনশীল
উপসংহার
JPG কার্যকরভাবে কম্প্রেস করার অর্থ হলো আগে রিসাইজ করা, তারপর 75–85% লসি কম্প্রেশন প্রয়োগ করা। এই দুই ধাপের প্রোটোকল ন্যূনতম দৃশ্যমান প্রভাবের সাথে 40–98% ফাইল সাইজ হ্রাস দেয়। 2026-এর জন্য, অপ্টিমাইজেশনকে আপলোড-পূর্ব অভ্যাস করে তুলুন: Google PageSpeed Insights চেক করুন, আপনার ভারী ছবিগুলিতে ShortPixel বা TinyIMG ব্যবহার করুন এবং অতিরিক্ত SEO লাভের জন্য WebP বা AVIF-এ পরিবর্তনের কথা ভাবুন।
FAQ
বেশিরভাগ ওয়েব ফর্মের জন্য 50 KB কি যথেষ্ট ছোট?
হ্যাঁ। বেশিরভাগ সরকারি, স্কুল এবং চাকরির পোর্টাল 100KB থেকে 500KB-এর মধ্যে সীমা নির্ধারণ করে। প্রোফাইল ছবির জন্য, 50KB একটি চমৎকার লক্ষ্য। হোমপেজ হিরো ছবির জন্য, 200KB-এর নিচে থাকুন।
একটি JPG একাধিকবার কম্প্রেস করলে কি গুণমান নষ্ট হয়?
হ্যাঁ — এতে জেনারেশন লস হয়। JPEG লসি, তাই প্রতিটি পুনরায় কম্প্রেশন আরও বেশি ডেটা মুছে দেয়, দৃশ্যমান আর্টিফ্যাক্ট তৈরি করে। সর্বদা আসল উচ্চ-গুণমানের ফাইল থেকে কম্প্রেস করুন, কখনোই আগে থেকে কম্প্রেস করা সংস্করণ থেকে নয়।
ছবির জন্য PNG-এর বদলে JPEG কেন ব্যবহার করব?
JPEG-এর লসি কম্প্রেশন লক্ষ লক্ষ রঙের ছবির জন্য তৈরি, যা একই ছবির জন্য PNG-এর চেয়ে 5–10x ছোট ফাইল তৈরি করে। PNG লসলেস এবং লোগো, টেক্সট ও স্বচ্ছতা প্রয়োজন এমন ছবির জন্য ভালো — কিন্তু এটি ফটো ফাইল অপ্রয়োজনীয়ভাবে বড় করে তোলে।
SectoJoy
Let Compress publishes practical guides for compression, conversion, and browser-based file workflows.
Follow SectoJoy